Sunday, August 22, 2010

Shed tips - free shim steel, and parallels

just another post to prove I'm alive, and trying to live up to my commitment to publish up the things I find useful, hoping someone else finds them useful.

Another "free" tip - shim steel
The anti-theft widgets I find inside PC software, DVDs and other packages often looks like a small rectangle. Inside is normally 3 pieces of incredibly thin steel - suitable for shimming tool bits up to 1/4" wide.
After several years of cutting these things open, only to fight with the sticky tape inside, this is the easiest way I've found to open the widget.

Figure 1 - the "unopened" widget

Using a sharp knife, slice the case near the bottom flange


Figure 2 - opening the widget

Remove the strips which you can easily - there may be one at the bottom under another layer of sticky tape - leave it at this stage


Figure 3 - the removed pieces, and one still in the case (under tape)

Cut the end off the rectangular plastic, as close to the end as possible

Figure 4 - sliced tape so the last piece can be retrieved

Insert the point of the blade between  the tape and the shim, and then slice back into the tape to cut the top off for at least 1/4".
Remove the remaining shim, discard the rubbish.

Result - Three pieces of shim, without any glue residue, or creases.

Bonus Tip  - "free" parallels
 an oldie but a goodie
Salvaged bearing races make good parallels, particularly for packing on the mill or lathe.
I took the time to dismantle a stash of saved bearings which were not worth saving (sand in the races)
Someone suggested drilling out the rivets holding the cage together - easier said than done, and it cost me a 4mm HSS drill - not again.


Figure 5 - old bearings too rough for use - destined to be dismantled

What I did was use on of my punches to drive the cage towards one side (punched in the gap between 2 balls) so the cage was deformed to the other side, then flipped the bearing and struck it back - I repeated this about 2 times and the cage broke at the point of the flexing. Using the point of the punch, I levered the cage material up, and then started winding it around the points of some pliers - most of the time the metal tore at the rivets, sometimes it broke, and all I'd do is commence from the other side and eventually all the cage was removed.
Then it was simply a case of pushing the balls all to one point in the races, and the inner race was able to be persuaded into the side without balls to drop away freely.


Figure 6 - a collection of free parallels for packing on the lathe.

Each bearing yielded 2 races with perfectly parallel sides, and a number of ball bearings which get filed away for use in detents, etc.

Speaking of detents - I pick up old disposable cigarette lighters whenever I'm out walking the dog - people are forever dropping them on the streets when they run out, or become damaged, The mainspring (the one pushing the flint up) is the perfect size for making/ replacing small detent springs (and extractor springs for rimfire bolts) - just another excuse to bring home junk, then pull it apart and file the parts.

What's on the horizon?
Webpage wise - I'll push to continue reviewing and recommending books - I can do that with little to no shed time.
Shed wise - Added 2 more projects to the "To Do" list (the "do to" list is at 12 major projects, and 23 minor projects and counting) - first is a couple of MOT spot welders (wound the first transformer last weekend), the second is building a electronics device to semi automate gear cutting... there are commercial offerings out there which do this, but the ulterior motive in this is getting my microprocessing skills back - I'm an Electrical/ Electronics engineer by training, but I spend more of my leisure time doing mechanical fitting - the irony has not escaped many people, especially myself.

Monday, August 9, 2010

Scrounging up materials - tips, etc

I am alive – I’ve just been burning the candle at each end, the middle, and a few other places.  Mostly work demands due to a sudden change in my shifts, but one thing upon another and I haven’t had as much time, or energy, to sit down and update this site.

I did get to do some cleaning in the shed on the weekend just gone, and as part of that I  photographed these two useful tips.

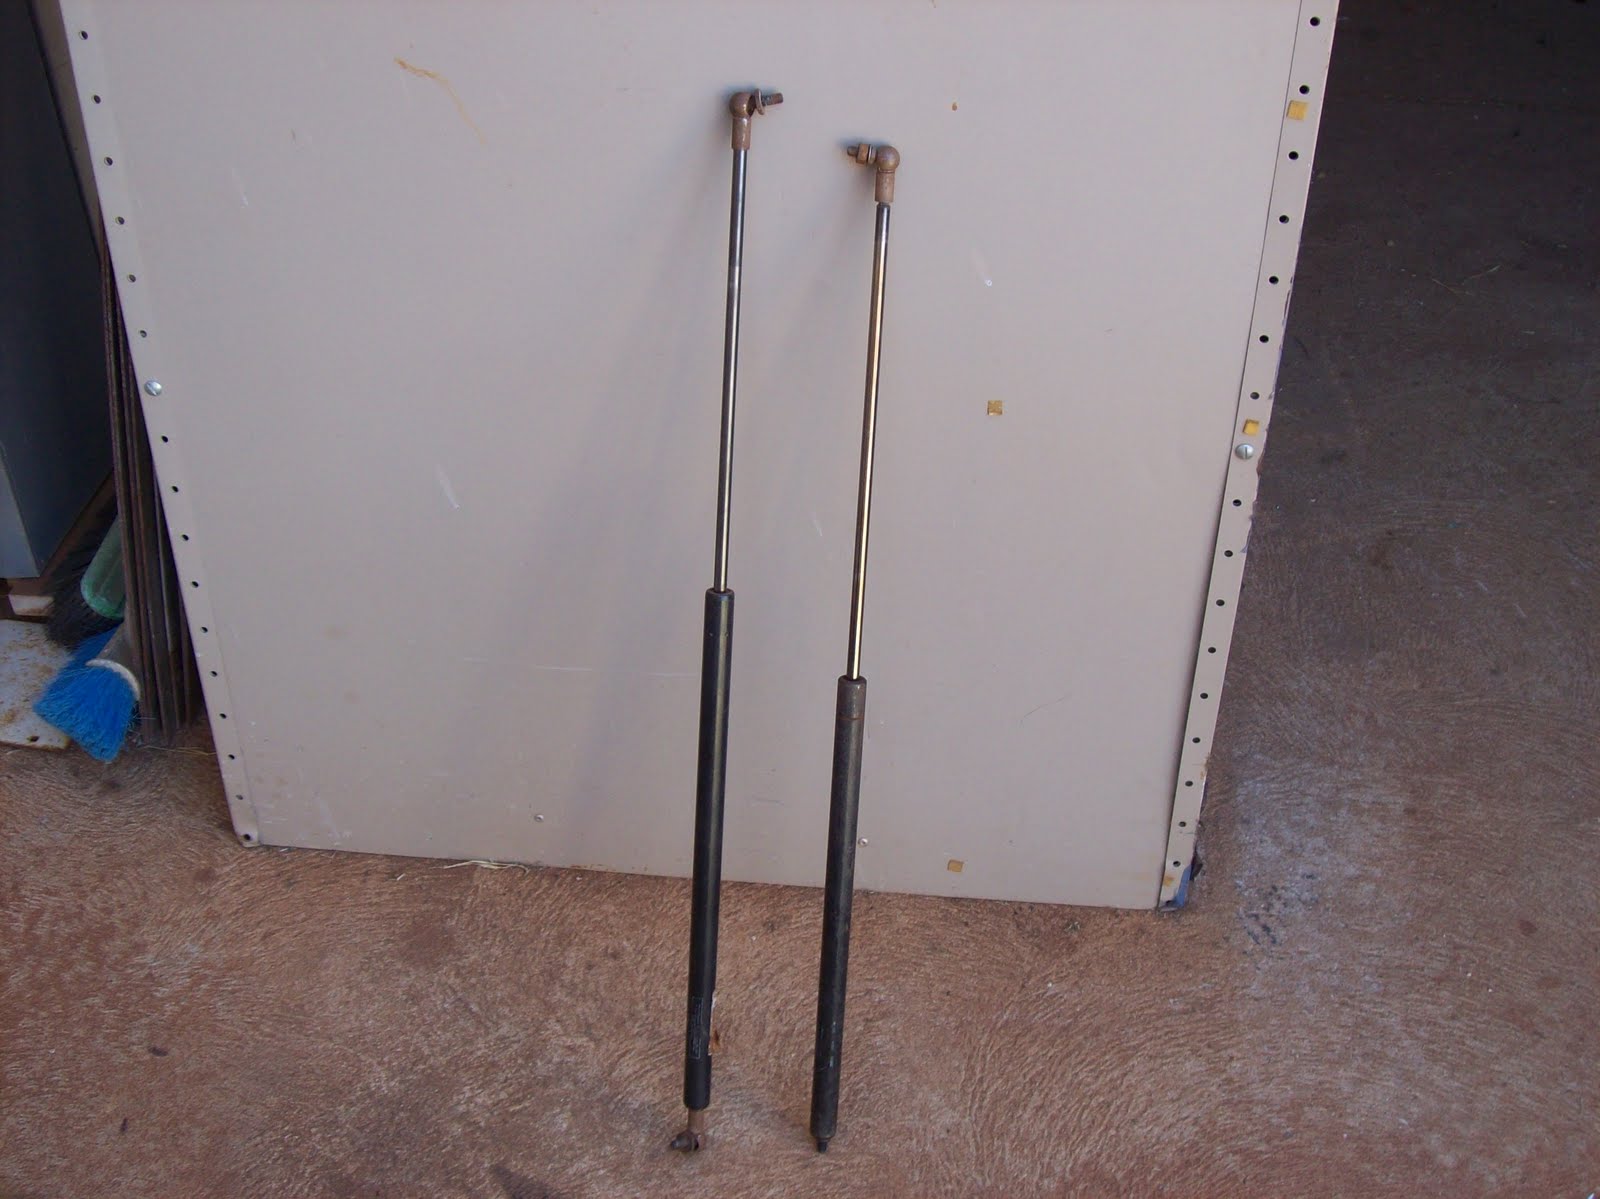
Firstly I need some STRONG steel rod for a couple of upcoming projects. One source of high tensile rod is the rod in a gas strut. I always keep my eyes open for any of these being tossed out, and I opened another 2 on the weekend in front of the camera. NOTE: opening these can be dangerous – I take precautions, but don’t blame me if you get hurt doing this!!!


Figure 1. Gas struts as recovered from being tossed out

The cylinder is filled with pressurized gas and oil. Near the end where the rod comes out there is some crimping which acts like a seal/ travel stop. I dress in appropriate PPE ("Personal Protective Equipment - in this case - ear-muffs, face-shield, leather apron) and work with the grinder and cut area pointed away from me. The first longitudinal cut in that area will suddenly release the gas and oil – I point that in a safe direction and let it vent out. Then once vented, I cut 3 or 4 longitudinal cuts for about 20-30mm above the crimped line. This allows me to remove the rod with it’s piston/ seals captive on the end.


Figure 2. Longitudinal cuts through crimped area to allow piston and seals to be pulled out of cylinder

I then grind off the peened over section of rod, and remove the piston/ seals from the rod.


Figure 3. Showing the peened end of the rod in the piston

The result is a strong, straight length of high tensile steel which has a polished surface. I now have 4 of these rods, one will be used to make the mast/pillar for the magnetic DTI base, another for my upcoming taper turner project, and the other 2 (matched pair) will be set aside as candidates for a Z axis slide in my CNC mill project. The photo below shows the 2 recovered rods on the RHS of the grinder.


Figure 4. Salvaged high tensile steel rods.


A useful tip I picked up from one of the contract firms I saw at a worksite…
We all have had a retractable steel tape measure break on us from time to time, I used to throw them out when I realized I “never get around to fixing them” – Not anymore.


Figure 5. Broken 8m tape measure


Instead I now open them up carefully

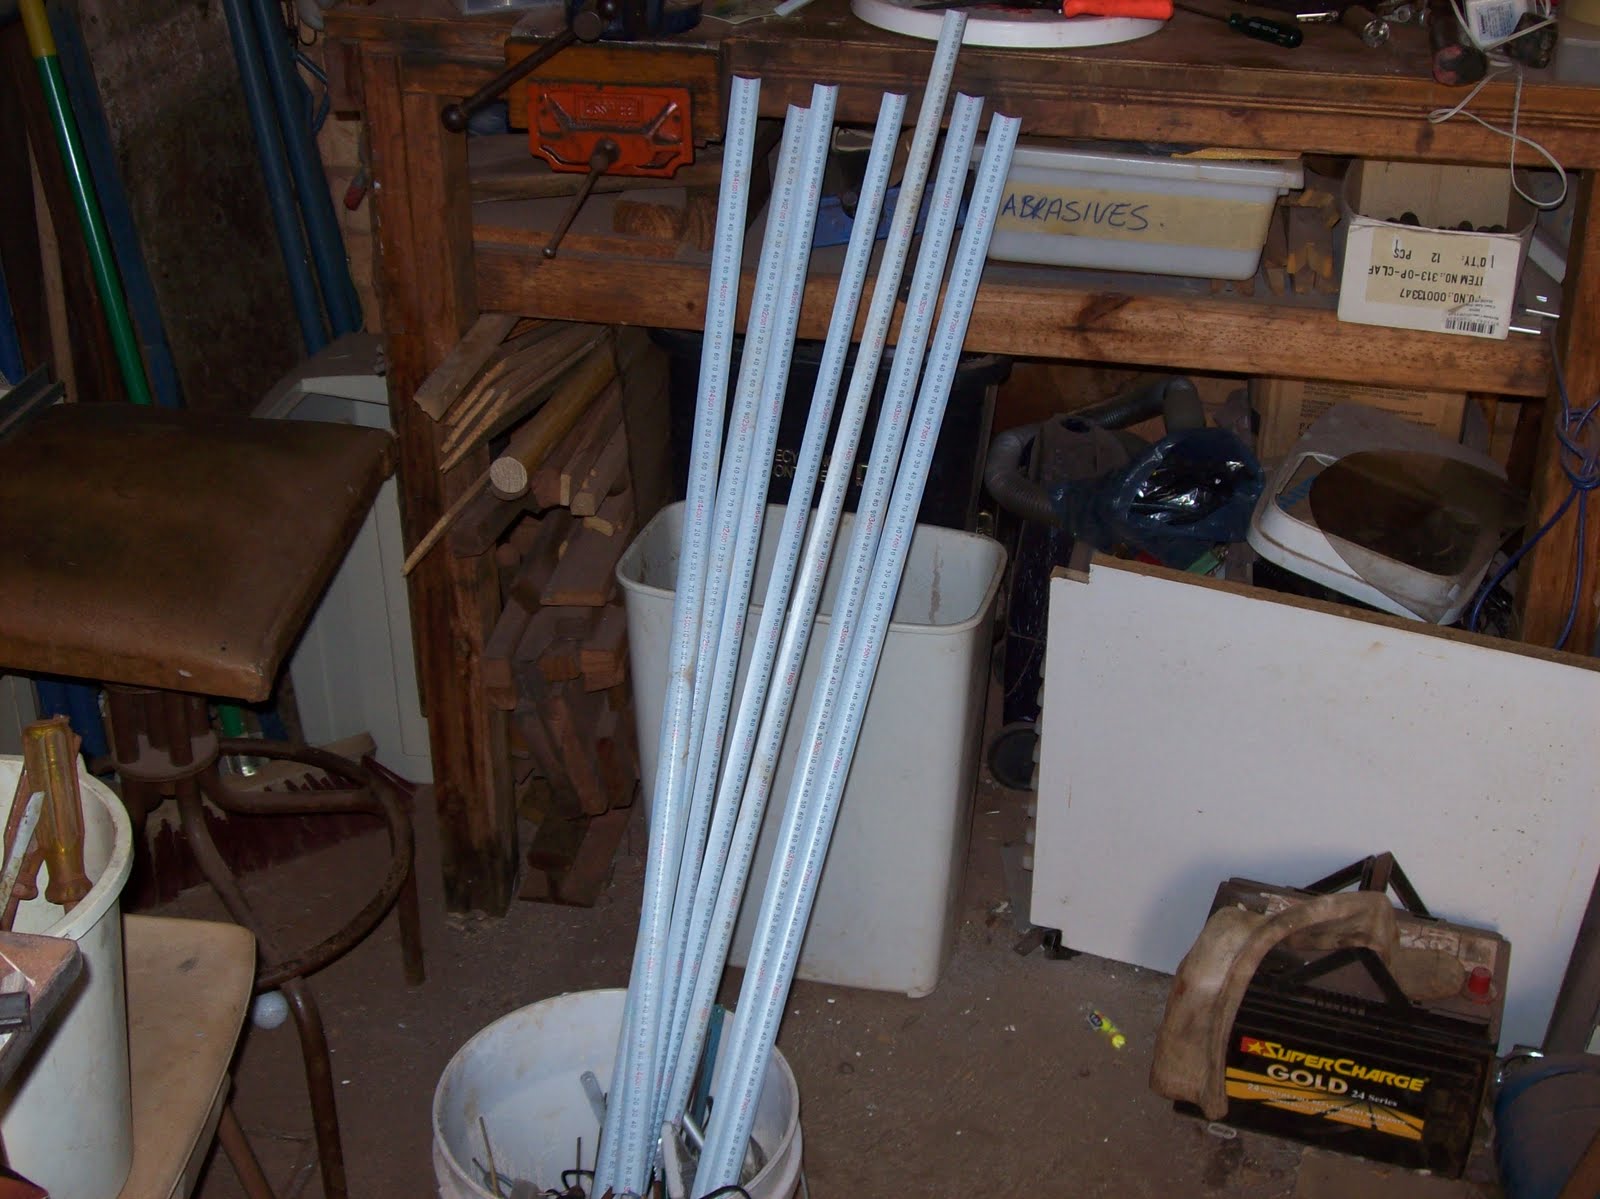
Using some heavy duty scissors (good tin-snips will do here as well) I carefully cut the measuring tape into useful pieces

Figure 6. Opened tape measure and snips

Since Oz is a metric country, most tape measures will have meters (with or with out imperial markings on the other side) so I cut the tape on the multiples of 1 meter.

Figure 7. Tape cut on meter markings

The resulting pieces are used as “disposable” yard sticks – useful for taking to messy places, using at the welding table, etc.

Figure 8. Seven 1m "yard sticks" made from one broken tape measure

I keep a stash of them threaded in the frame of the shed door – always there ready for use whenever I need a ruler for measuring something.


Figure 9. About 15 yard sticks threaded in the door frame of the shed.


I have 2 broken tape measures I haven’t cut up yet “in storage” for my CNC mill – these will be affixed on the sides of the axes for quick positioning/ verification under jog/ MPG control.

If I have time, I’ll put up the account of the other salvaged/ scrounged useful junk I worked on during this weekend’s clean up. (free shim steel and “free” parallels)

Time - it always comes back to that - a question of what to do with the limited amount you have each day...

Thursday, July 1, 2010

Reprint Popular Mechanics sets, and other Algrove gems

As part of pointing out useful books and references, I'll start with one of the two biggest sets I have.

The Popular Mechanics "Shop Notes" books have been read now, cover to cover at least twice, and I fear the number of bookmarks in the books make them lean when stacked.

I saved up and bought the reprint set through Lee Valley tools a few years ago, and have used some of the methods and ideas in there at work from time to time - a wonderful reference.

The link to the set is here, and currently costs $165 USD. You can buy the books in sets of 5, or as individual books, so budgeting can be eased. I cannot recall the exact shipping charges to Oz, but I know it was quite reasonable considering the number of books.

Each book is roughly the same size at 240mm x 165mm x 15mm (H x W x T) although the thickness does vary a little with some books being 12mm thick, and others at 18mm thick. The books are all black and white reprints, and of excellent quality and reproduction.
The picture below is from the Lee Valley page noted above.

The reprint series is printed/ published by Algrove, and some of the books are listed on Amazon such as this. It's your call how you like to buy books, but with the above information and links, you should be able to find the books.

If you can afford it, there are two other sets of books well worth looking at from Lee Valley (not saying the rest aren't good, but these are ones I can reccomend based on reading them...)

The first other suggestion is the "Boy Mechanics" series - it's a set of four books, each the size of a novel. They remind me of the books my Dad had when he was young, all about things boys can build from timber, salvaged materials, etc.
UPDATE!!! - Whilst checking for the link I found this set is being discontinued and is heavily marked down!!!! A shame, but don't miss out. The link to the series is here through Lee Valley


The picture is again from the Lee Valley webpage. Some of this series can be bought for a similar (discounted) price from Amazon like this.

The last set of books I grabbed from Lee Valley was the "Bull of the Woods" books. They are a series of machinist orientated cartoons. There is a similar cartoon in the old Model Engineer magazines about "Chuck, the Muddle Engineer", but the "Bull" series is more serious, but just as funny. The books are the size of a Reader's digest, and each cartoon is a single frame, one per page. Here is the link from Lee Valley, and the picture below.

I did find a listing for one of these reprint books on Amazon, but I won't insult anyone by posting the link.. the "sellers" wanted $222.80 USD for the one book new... compared to the $3.95 USD ea at LeeValley, you can see why I don't bother linking the listing.

These books represent a valuable archive of knowledge and ideas from the period of time when machines were powered from shafts and belts, and CNC and computers were unheard of, HSS was a new thing, and even electric motors were a rarity.

The Popular Mechanics set includes gems such as how to turn a pulley of 28" diameter on a lathe capable of only 16", or how to lift several tonnes of line shafting up into the shaft hangers without using a crane - the list goes on and on... If I had to choose only one set from the three mentioned here, this would be the set. I hope my own children will learn from the sets as much as I have.

NOTE: Just a general note about the postings discussing books. Where possible I'll provide links to purchasing the books, and try and provide options. Typically Amazon will carry the books at the best price, but there is the odd, rare occasion where it's cheaper elsewhere, or amazon doesn't carry the books. In those cases I'll provide links, and comments to that effect - it's nothing against Amazon (goodness knows they get enough of my money as it is), but I try to stretch my money as far as possible, and presume others have the same limitations...

Monday, June 28, 2010

Still alive - ingot trays

Sorry this posting has been late in coming... I've several previous projects to document, so the fact I haven't been in the shed is no excuse for not writing.
I'm currently putting the finishing touches on the design for the backgearing of my Taig lathe. I built and installed a leadscrew (with halfnuts) about 18 months ago, and the intent was always to add change-wheels and a spindle gear to drive it. I stopped working on that (temporarily) while I figured out how to drive the leadscrew, and get the speed ranges I was seeking - the backgearing evolved from that, and now it's practically completed in it's design (Got more parts for it today), I'll start construction of it this weekend.

It's kind of ironic when I think of it... I bought the lathe so I could build a hybrid rocket motor. I didn't start that because I wanted to bring the lathe up to spec with what I wanted. That meant I had to build other tools (furnace, etc), which created more needs, and on and on it goes. Now here I am, 10 years later, and the rocket motor still isn't built, and even if it was, I can't use it in this area.
Not that I regret the journey, but it is a long road which could have been considerably shorter (time wise) if I had the money to begin with. I guess it's part of the ME (model engineering - not narcissism) sickness that every project means more tools, jigs, projects, etc

Let me introduce you to one of the projects spawned out of another project, which was built to build another project...... The ingot trays from my furnace.

The furnace (another set of pages yet to come) can hold crucibles of up to A30 - in other words 30lbs (~14Kg) of molten aluminium at a time. In "smelting mode" it can melt as fast as it can be fed (I've gone as fast as 100lbs per 10 mins) limited only by how fast the molten aluminium can be captured.
To handle excess molten metal (from smelting or casting) I built up 2 ingot trays - one small, one large. Both are made from salvaged 3"x3"x1/4" angle iron.
The small tray has lengths of 12" making the finished ingots a triangle shape with sides of around 2.75" x 2.75" on the sides (4" across the long edge) and 12" long
The long tray is made of the same angle iron, but the lengths come out at 22" - this is too long for my crucibles, so I put a removable "breaker bar" in the tray to mold in a weakened break point in the longer ingots.


The photo above shows the removable bar in place in the large ingot tray - the bar is held in place by 2 1/2" pins which rest in the short lengths of pipe welded to the sides of the tray. (pipe visible at middle of front edge of tray)

The photo below shows how the bar has "wedges" welded to it which do not come to the bottom of the angle V, but leave a 1/2" gap at the bottom for the flow of molten aluminium. The sides come to within 1/16" of the side walls. Once cold, the resulting ingot can be snapped in half by a sharp rap on the concrete floor.


The photo above also shows the angled end on the LHS - the RHS is cut square, but the LHS has about a 15 degree slope to it to aid in the removal of the cooled ingots. The RUST is left in place to act as a "mold release" to prevent the aluminium from sticking to the tray.


The photo above shows the gaps mentioned at the bottom of the angle, and the slight gaps on the sides.  All the welding is done on the outside, so there is minor narrow gaps here and there in which aluminium will freeze, but these don't seem to cause issues, and the minor loss is negligible.

Moving the trays whilst hot proved to be harder than originally thought. Originally I used hooks and wire loops, but found the trays would catch on irregularities in the concrete floor, plus I worried about the heat from the trays causing issues with the concrete floor. My sand traps didn't make the movement of the trays any easier (to put it politely) so I looked at making wheels for the trays. What I came up with is shown below...


The photo above shows the "wheels" I fitted to the ingot trays. These are simply short bolts with their heads welded to the inside of the tray with the shanks pointing towards the middle of the tray. The bolt then had a number of wide washers slipped on the shaft, and then a nut wound on and captured with a wire threaded through a cross hole to stop the nut coming off too easily. Four of these were welded on each tray so the wheels worked along the long axis of the trays. The existing wire loops (handles) were retained, and the trays moved quite well over concrete, and sand traps.


As you can see, these trays don't need to be "babied"... they sit out in the weather, and are ready for use whenever they're needed since the rust helps release the ingots.
The height of the rays is so slight, they fit under the furnace drain hole to catch any crucible failures, (or smelting mode), and the wire loops are long enough to permit one tray to be lead in under the furnace without disturbing the other tray - making swapping from one tray to the other seamless, without spills.

All welding was done with my CIG stick welder, and the original cutting of the 3x3 angle iron was done at work on one of the bandsaws.

What would I do different if I built more? I'd probably make the trays only take 3 ingots at a time, instead of 4 to reduce weight. I'd make the ingots all the same size, instead of maximising use of salvaged metal. I'd learn how to do internal fillets so the trays didn't have small internal seams.

I've a few other projects already completed to document, so I'll try and get them done, even if the current projects aren't getting the progress I want them to have.

Monday, June 7, 2010

not forgotten, just flat out

I haven't written lately due to other demands on my time and energy.
Generally I'll try and publish based on the current projects, or projects I've already completed, and have documentation for.

Because of the various demands on my time and energy lately, I haven't done anything in the shed except some minor cleanup and salvage - hardly worth reporting yet, although what was salvaged will hopefully prove quite useful.

What's taken my time? - work, church, responding to emergency calls, some training, helping people with various problems, listening to people's problems, etc.
What's taken my energy? - pretty much as above - I actually find the emergency responding quite fulfilling - gives me a sense of making a difference. Listening to people's issues, and trying to help them overcome the same issues which have been in place for years and years can be quite draining.

So sorry about the rant - this post is more just a simple "I'm still alive, and I will post something of value soon" message... we all have problems - we all know people with problems.. some are there to be fixed, some to learn from, some to endure...

What's on the radar?
repair of the magnetic base indicator stand.
repair of a broken mitoyo vernier height guage
design, construction, and use of a taper turning attachment for a taig lathe
adaptation of taper turning attachment to profile copying attachment

I think that's about it - more plans than hours in the day - situation normal.

Sunday, May 16, 2010

Sharpening sticks - an alternative to stones for razor edges

A recent email ad from Amazon about sharpening gear jogged my memory about documenting my own sharpening systems.

I have a number of sharpening systems I use, and use them based on what I'm sharpening, and how much shaping of the edge is required.
The systems I use for aggressive removal of material from the edge, centre around the typical stones used in most workshops and homes. A friend from wayback taught me to use babyoil on the standard carborundum stones favoured by butchers and handymen. The lighter oil carried away the metal flakes, and did not clog up the stone as it dried. I have a few "inherited" stones which are sticky and almost tar-ry in feeling with old oil soaked into them.
I also have some water stones such as this, which I use from time to time. My first water stones were actual carborundum stones, but instead of using oil on them, I used water as the lubricant. I eventually purchased a few proper water stones, but only use them occasionally.

I also have some diamond plates. I don't like calling them stones since they resemble plastic backed plates of metal, with the diamond material bonded to the metal. I occasionally use them for aggressive removal of metal, but find they can be too aggressive, and leave deep scratches. Admittedly the plates I have aren't as good as the ones in the link above, but they look similar. I think mine were some cheap chinese knockoffs, so the "fine" is more of a "medium", etc. They have their use, but I don't use them for honing an edge.

I used to be heavily involved in model rocketry, and would still be if it weren't for the firebans in this area. One of the tricks I learnt in model rocketry was the concept of mounting disposal scalpel blades into permanent holders, and then resharpening them as required. I cannot recall the webpage which introduced this concept, but from memory it was one of the HO scale sites.
The sharpening method the site used was perfect for such small blades, and I used it every since for all size blades.
The main premise of the system presumes the blade shape is already correct, and all that is required is to refine the cutting edge whilst preserving the angles. A selection of "wet and dry" carborundum paper is obtained in a number of grits - I used 400, 600, 800, 1000, and 1200.
I obtained some timber of size 35x12 (1 1/2" x 1/2") DAR (Dressed All Round) and cut it into lengths of about 350mm (14"). I cut strips from the wet and dry paper, and glued them to the wood strips using rubber cement. The photo below shows a number of these sticks with the size written on them with a permanent marker, and a 3/8" hole drilled through the top for hanging.


The other side of the stick has another size glued and labeled to it... except the stick on the right. An observant reader will notice 2 sticks with 400, and  1200 grit paper attached. Part of this was due to the even number of sides, and the odd number of papers (including the RHS one), but the main reason for the duplication is the heavy work 400 grit gets early in edge refinement, and the regular use 1200 gets for touchups. These two grit sizes get more work than the intermediate sizes, so they are duplicated. I still use the intermediate sizes, so will not give them up.

The right hand stick has a strip of leather glued to it (again with rubber cement). The leather was cut from a discarded belt, and has then had rouge rubbed into it. The rouge was standard cheap Tripoli, nothing fancy. The leather strip becomes a strop to polish away any fine scratches in the sharpened edge, and to remove any burrs or "wires" I recharge the Tripoli every now and then, but the amount is uses is almost negligible.

So how is this system used?...  The tool to be sharpened will need to have it's edge geometry already formed by some other means. I use stones if minor rework is required, if major rework, then it's power tools to the rescue (grinder)
Once the edge geometry is correct, and all deep scratches are removed by use of a stone (or extra fine diamond plate), I will use the 400 grit stick to start sharpening the edge. I usually choose to hold the stick stationary, and move the tool, but sometimes it's easier to move the stick over an edge.

As the appearance of the edge improves, I will switch the sticks to the next grit up, working from 400, through 600, then 800, and to 1000, and then 1200 grit. By the time I've gotten to 1200 grit, the edge is not changing in shape, but merely becoming smoother, and almost "frosted" in appearance.

The photo above shows a cheap garage sale knife on the 1200 grit stick. Lubricants can be used with these sticks since the paper is designed to withstand moisture, and the rubber cement was chosen for the same reason. Eventually the sticks may warp, but since I dry them after use if I wet them, I've never observed any significant warping - these sticks were made over 10 years ago. The only lubricant I've used on these sticks is water.

The photo below shows the mirror finish on the edge of a knife after using the leather strop.

The above knife was one I found laying on the road when walking to the train station several years ago. The tip had been broken away, and the edge bellied out in that area. (I suspect it had been used to twist something open, and the tip broken off as a result.) I reshaped the point using a grinder, and put a tanto style chisel point on the blade. After some work on the stones, the point, and edge of the blade had a useful blade geometry, and fairly pleasing lines. After using the sharpening sticks on it, the cutting edge (with it's mirror finish) extends from point to ricasso in a width of around 2mm (~1/16") As a knife, it's a rough cheapie which suffered a hard life, but now resides in my workshop as a general utility knife and can cut most things I point it at.


I keep mentioning blade and edge geometry. I've got a couple of books I've read which discuss how to sharpen tools, knives, etc. Both books shown below have their strengths and flavour.


The Razor Edge Book of Sharpening by John Juranitch
This book is good at explaining what to do, how to sharpen common tools, and has some good pictures covering methods, and testing an edge. John is quite vocal about how simple sharpening should be, and illustrates the gaining, and protection of edge geometry well.


The Complete Guide to Sharpening by Leonard Lee
Leonard Lee is a name most woodworkers know from the company "Lee Valley Tools". This book covers the finer detail left out of the preceding book (John Juranitch), and discusses some metallurgy, and the effects of edge geometry on certain tasks, and the effects it has on finish, effort etc. The other main appeal of this book is the demonstration of sharpening methods for common, and some "not so common" tools.

To some up, John's book is good for homeowners looking for some skills in sharpening, Leonard's book is for workshop folks looking to understand and maximise the ability of their tools. I cannot recommend one book over the other, and instead took advantage of the bundling deals amazon seems to run when buying both books together.

Everyday First-Aid kit - gloves and portability

Personal protection during emergency response is the first priority of all responders. After all, it's no good responding to an incident, and becoming a casualty as a result.
Training, exercises, shared experiences all help prepare a person for protecting themselves... and there are also procedures to help (S.O.Ps cover things such as equipment, PPE, and biological protection)

I've attended a few incidents where my first responsibilities have been more of a firstaid/ medical response, as opposed to rescue, or fire. All of these incidents have been motor vehicle accidents (MVA), and the ambulance service has not arrived prior to fire and rescue personelle. The first MVA I worked at, I forgot to wear nitrile gloves under my leather gloves due to the tunnel vision of responding. The discussion with leadership afterwords brought the training home hard. Since then I've prepared some disposable gloves and store them in my helmet for protection.
I purchased some strong disposable gloves (shown in photo below) and sorted the gloves out into pairs.


I then rolled (from the fingers to the wrist) the gloves to exclude as much air as possible, and placed the rolls in some ziplock bags. The photo below shows two pairs of gloves, in the bag - one pair on the left, the other on the right.


The gloves do settle down over time, and the bags never seem to seal 100% against air, but dust, sweat and water don't seem to get in the bag,  so that's what's important.

I got to thinking about those incidents, and came to the conclusion that I would be wise to make up a small firstaid kit. The professionals I work with use the large "Thomas packs", but for my duties and daily roles, this would represent overkill, and would be beyond my current experience and training. My criteria for the kit would be:

1 - small enough to sit on the front seat of my car, and not be in the way of passengers, or work activities.

2 - able to be placed either on my shoulder, or around my waist , thereby keeping my hands free for scaling stairs, ladders, or other paths to an injured person.

3 - contain the essentials to maintain life for the time needed for a fully equipped ambulance to arrive (estimated at 20 mins - worst case)

The intention was to be able to provide resuscitation, observations, and rudimentary bleeding control for a casualty until the ambulance arrives, or until I expect to "run out of steam".. and based on my previous experience, I'd been totally worn out after 20 mins of providing full CPR.

I purchased a "bum bag" off one of the airsoft sellers on Ebay (Note to US readers... "Fanny pack" isn't the term in Oz.. means something totally different here). I wasn't too worried about colours, but went with the typical OD green so dirt stains wouldn't be as noticable. This particular bag had a strap which could be moved from a waist strap, to a shoulder strap, which added appeal for what I was trying to accomplish.


I added a "hard shell" security case I bought from another seller, and filled it with bagged gloves (3 packs, each containing 2 or 3 pairs of gloves). The security case simply clipped on to the strap/belt.
Since the photos were taken, I've added a smaller "pouch" on the side of the bag between the bag and the glove case. This pouch holds a pair of 7" shears for cutting clothing, etc.

The bag as purchased from the airsoft guy has a number of pockets (one on the front, plus one on each end, and the main big section in the middle). I basically put a resuscitation mask, and my observations notebook (with a pencil) in the front pocket (as shown below).


Some standard bandages (not a huge selection, I'll prioritise their use on assessment of the scene), and a selection of bandaids were placed in the middle pouch with a mylar sheet (Space blanket)


A number of safety pins were pinned on the straps dotted around the bag, and some pens were clipped in convenient locations (The aforementioned pencil is my backup).


The downloadable pupil chart mentioned in the previous post has been laminated, and a copy is taped inside the obs notebook, and a strip version is loose in the front pocket.
There's still some room inside the kit, but I won't fill those spots until I have some more experience, or insight on suitable items.

Most of the time I carry my torch, and a Leatherman with me. Between those, and this kit, I'd like to think I'm more able to help others than I was previously.

I've used the Leatherman a few times at incidents and been very impressed with how well it's worked. I ended up procuring a second Leatherman after the loss of my first, and deliberately choose the Charge model for the hook blade, and the intent of using it to cut seatbelts.

I'll do up another post someday about Leathermans (and other multitools), but simply put...

I've owned several pocketknives over the years, some I've sorely missed, others I'd rather forget. I've yet to use a Leatherman I didn't trust, but certain models seem to suit my needs better than others. My previous favorite was the heavy Core model, and upon it's loss, it was replaced with the Charge ALX. I've tested the Charge TTi, Wave,Surge, Fuse, and SuperTool300. They all have their features and purpose, and none has failed to impress me. I've also evaluated a few other multitools for use... I won't mention names, but one particular unit was so bad to hold and use, I couldn't even give it away at the end. My current everyday Leatherman is the Charge ALX, carried in the old nylon pouch from the Core on my belt beside the Fenix LD2 torch. I have a backup Charge TTi in my turnout gear, with a LD20 torch.

Bladesmithing is one of my interests, and once I get the forge finished (yes another project to document) I'll get more into the forging of blades (instead of my previous "stock removal" projects), but I'll still carry the Leatherman.