In the absence of forging, I decided to cut the rod and using the cuts as weaknesses, bend and then reweld (sort of like scoring cardboard to bend it)
 The above photo shows a piece of rod with the cuts made, and another piece already being bent using the cuts as a weakness.
This photo shows how the pieces come together to make the finished hook. They are welded together as part of the construction, and the cut rod will have the exposed areas built up by welding.
 Nine hooks welded up, all cut areas built up, both hooks joined at the top, bottom, and back, and the ring added.
A note about the rings. They started life as an offcut of scrap I fished from the scrap bin. I cut them into 1" (25mm) long pieces on the cutoff machine (aka drop saw) and then took them home. I chucked them in my lathe, and deburred them inside and out. I then turned a deep 30 degree chamfer on the inside at each end of the pipe section.
Once everything was welded, I hit then all over with a flapwheel in the grinder (these things are amazing!!! never used one until Bender - Now I'm buying them online whenever possible)

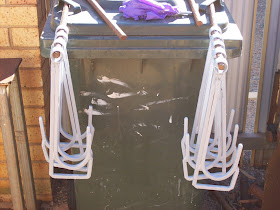
The results of flapwheeling the hooks was pretty good, I found a few welds to redo, then got the hooks ready for painting - the primed hooks shown below.

After two coats of primer, I painted two coats of epoxy paint over the hooks. It's "handrail yellow" supplied from the fitters at work. I reason the paint stands up to a lot of knocks and scrapes pretty well, and the bright colour will help the equipment stand out, and not be missed on the fireground. From memory the paint brand is "Galmet" - I can't be sure since I returned the tin once I was finished with it. The primer was the same primer I used for Bender - local "White Knight" steel primer.

Part 3 will cover the other part of the hose suspender.
No comments:
Post a Comment